

Many manufacturers stick with what feels familiar, even when the process slows things down. But as production demands rise, these older labeling systems start to show their limits and create bottlenecks, inconsistent labeling, and higher labor costs.
Still, the idea of switching to an automatic labeler machine can feel daunting. Where do you start? How do you know which equipment to choose?
Automation doesn’t have to be overwhelming. With a clear, step-by-step approach, transitioning to automatic labeling can be simple and cost-effective for your business. This guide will walk you through how to make the switch, so your new system is set up for long-term success.
Step 1: Evaluate Your Current Labeling Process
Before investing in automation, start by understanding how your current system performs. A thorough evaluation helps you identify what’s working, what isn’t, and where automation can make the biggest impact.
Start with the basics. How long does it take to label a typical production run? How many people are involved in the process? What percentage of labels need to be reworked due to misalignment, wrinkles, or placement errors?
Track these metrics for a few weeks. You may find that manual labeling takes more labor hours than expected and that inconsistencies create hidden costs through wasted materials and slower throughput.
Once you have a clear picture, define your goals for automation. Do you want to reduce labor costs, improve label accuracy, or increase production speed? Knowing your priorities will help you choose the right equipment later on.
Pro Tip: Involve your operators in this step. They know the pain points better than anyone and can offer valuable input on where improvements are most needed.
Step 2: Map Out Your Needs and Budget
Next, determine what your ideal automatic labeling machine should accomplish. Every production line has unique needs, so take time to outline the details of your operation.
Consider:
- Production Volume: How many containers do you label daily or weekly?
- Container Type and Material: Are you labeling bottles, jars, pouches, or cartons? Smooth or textured surfaces?
- Label Type: Do you use pressure-sensitive labels, shrink sleeves, or tamper-evident seals?
- Changeovers: How often do you switch between SKUs or label designs?
Once you’ve mapped out your needs, build a budget that includes the initial purchase price, training, maintenance, and potential future upgrades.
It’s also smart to plan with scalability in mind. A flexible labeler machine can grow with your business and accommodate new product sizes or formats without requiring a full equipment replacement.
Automation is an investment, but it pays for itself through faster throughput, fewer errors, and lower ongoing labor costs.
Step 3: Research and Select Equipment
Now that you understand your requirements, you can narrow down which system for automatic labeling best fits your line.

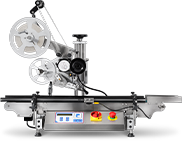
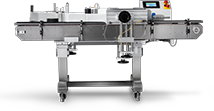
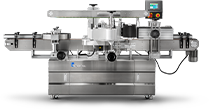
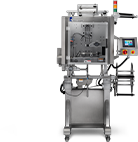
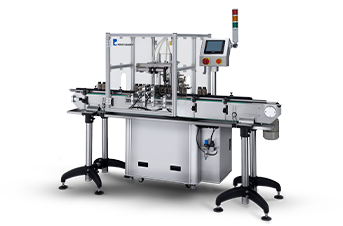
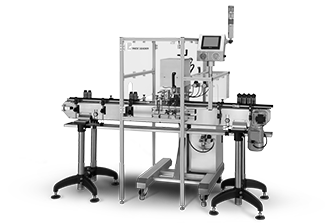
Labeler machines come in several configurations designed for specific applications:
- Wrap-Around Labelers: Ideal for round bottles, jars, and cans. These are commonly used in food, beverage, and personal care industries.
- Front and Back Labelers: Best for rectangular or oval containers that require automatic labeling on two sides.
- Top Labelers: Designed for flat surfaces like trays, boxes, or clamshells.
- Shrink Sleeve Labeler Machines: Provide full-body labeling or tamper-evident seals for premium packaging or regulatory compliance.
Focus on flexibility, user-friendliness, and maintenance. Equipment that offers quick adjustments, clear interfaces, and tool-free changeovers can save significant time day-to-day. Also, think about how it will integrate with your existing conveyors, fillers, or other packaging systems.
If you don’t know which model fits your needs best, we offer free consultations to help manufacturers match their production goals to the right labeler machine.

Step 4: Plan for Integration
Integrating a new automatic labeling machine into an existing line requires thoughtful planning to avoid downtime and ensure a smooth transition. The goal is to make automation work with your current setup.
Start by reviewing your line layout. Identify where the labeler will sit in relation to fillers, cappers, or sealers. Check for spacing, conveyor height, and product flow to ensure compatibility.
Speed synchronization is another critical factor. Your new labeler machine should match the pace of upstream and downstream equipment to maintain consistent throughput.
Work closely with your equipment supplier during this stage. They can help assess power requirements, line connectivity, and installation logistics.
Pro Tip: Take advantage of integration as an opportunity to review the efficiency of your entire production line. Adding automation can reveal that other small adjustments can improve performance.
Step 5: Train Your Team
A smooth transition to automatic labeling depends on how comfortable your operators are with the new system. When employees understand the “why” behind automation and feel confident using it, they’re far more likely to take ownership and keep things running efficiently.

Labeler machines are built with ease of use in mind and have user-friendly features to minimize the learning curve. But proper training is still essential to getting the most out of your investment.
Your training program should cover the following fundamentals:
- Basic Setup and Calibration: Teach your team how to get the labeler machine ready for each run and make fine-tuned adjustments.
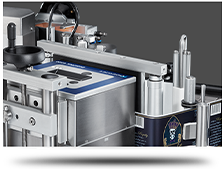
- Label Alignment and Adjustment: Ensure consistent placement and clean application, even across different container types.
- Routine Maintenance and Cleaning: Prevent wear, buildup, or adhesive residue from affecting performance.
- Common Troubleshooting Steps: Equip operators to quickly identify and resolve small issues before they cause downtime.
Training ensures every operator feels capable when working with your automatic labeling machine. By training multiple team members, you reduce reliance on one person and keep production running smoothly, even if someone is out or moves to a new role.
After the initial onboarding period, schedule refresher sessions or quick check-ins after the first few weeks to answer new questions and reinforce best practices. This ongoing education will build confidence and help identify minor issues before they escalate.
Ultimately, a well-trained team transforms your labeler machine from a new piece of equipment into a trusted part of your daily workflow.
Step 6: Test, Monitor, and Optimize
Once your automatic labeler machine is installed and your team is trained, your next goal is fine-tuning performance. When transitioning to automation, you must continuously improve efficiency as your line adapts and grows.

Start with a controlled testing phase. Run smaller batches to make sure labels are applied correctly, at the right speed, and without wrinkles or misalignment. Use this stage to observe how your products move through the line and where minor tweaks might improve flow.
As you gain confidence in your setup, track performance over time. Monitoring key performance indicators (KPIs) will show you where automation is making the biggest impact and where further optimization can add value.
Keep an eye on:
- Throughput Speed: Are you meeting or exceeding your previous production rates?
- Label Placement Accuracy: Are labels consistently straight and aligned?
- Downtime Frequency: How often is production stopped for adjustments or resets?
- Labor Hours Saved: How much time have you gained compared to manual or semi-manual processes?
These data points create a clear picture of how your system is performing. Use them to make informed adjustments that will boost overall performance.
Pro Tip: Encourage operators to document any recurring challenges or small adjustments they discover along the way. These on-the-floor insights can reveal practical improvements that lead to even greater consistency and throughput over time.
Build a Labeling Process That Grows With You
With a structured, step-by-step approach, you can move from manual processes to automation smoothly. In doing so, you’ll improve efficiency, reduce costs, and set your operation up for sustainable growth.
Automatic labeling machines eliminate rework and labor strain while ensuring every product looks professional and consistent. Whether you’re labeling hundreds or thousands of units, it’s an upgrade that pays off in the long run.
If you’re ready to take the first step toward automation, start by evaluating your current labeling process and download our free Practical Guide to Choosing Labeling Equipment to explore your options and plan your next move with confidence.


.webp?width=360&name=2x-color-logo%20(1).webp "2x-color-logo (1)")